Setup guide
Connect athletedata to ChatGPT
Add athletedata as a custom MCP connector inside ChatGPT. Takes about a minute - the only tricky bit is enabling Developer mode.
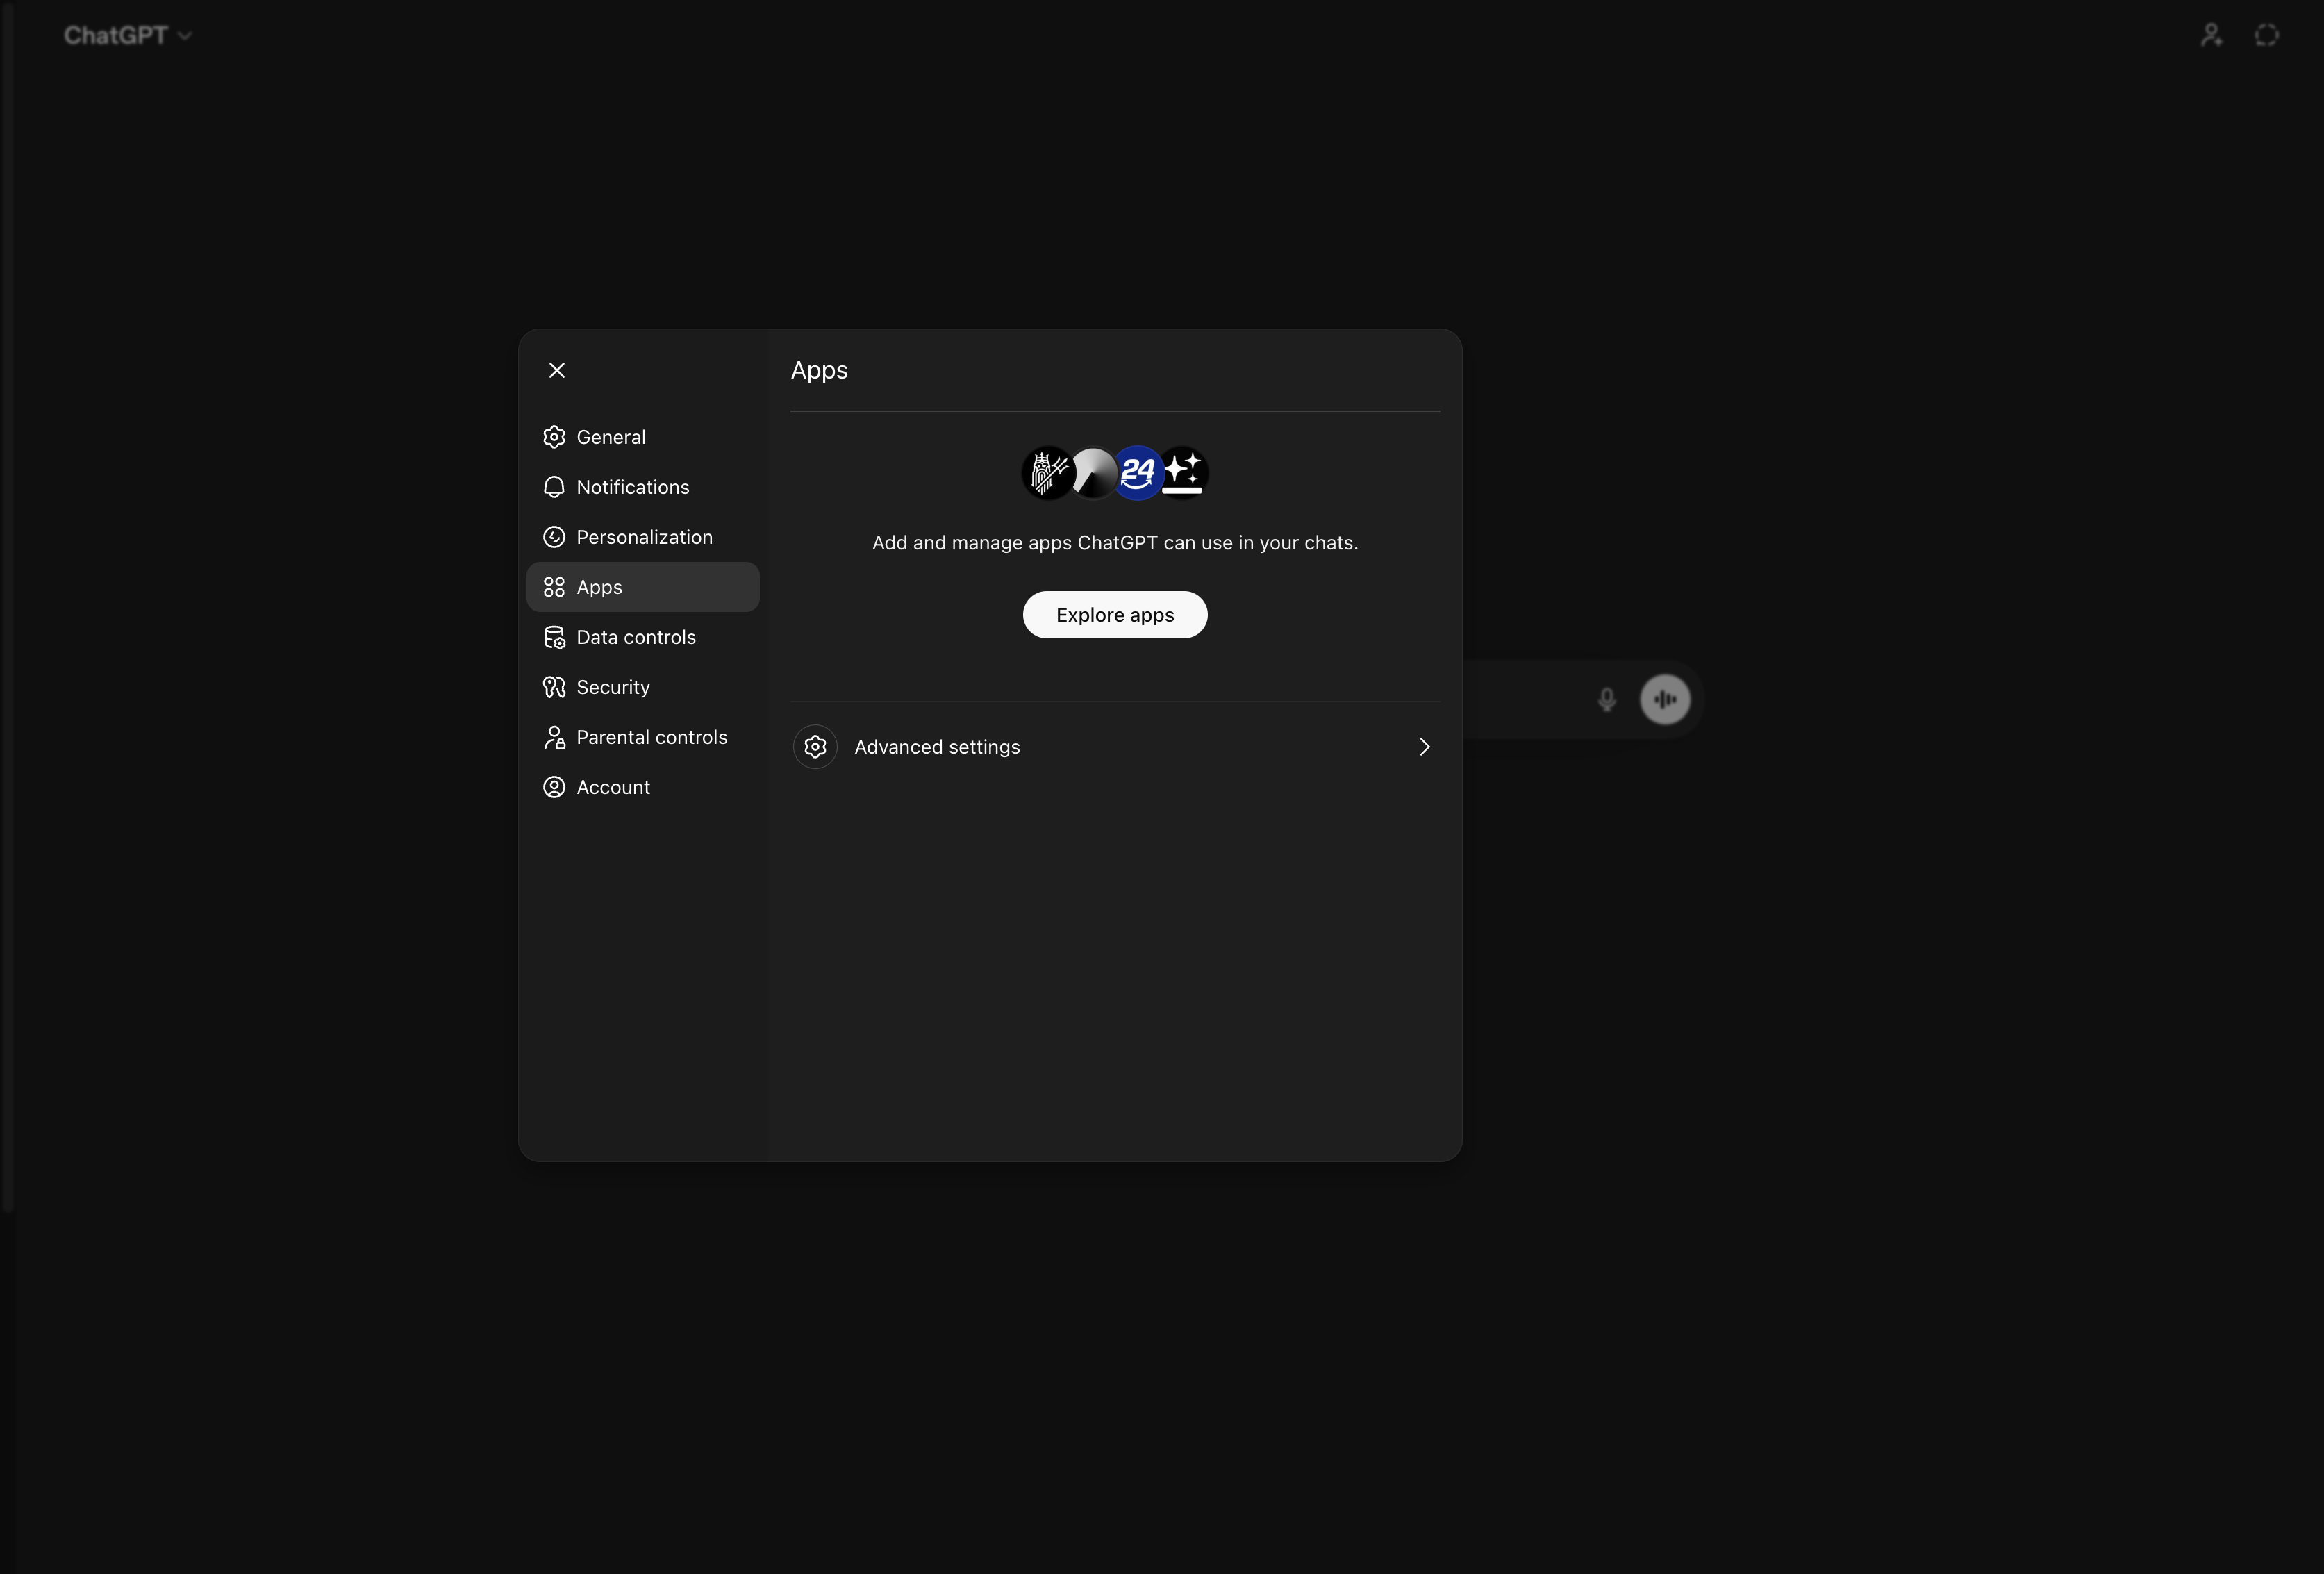
Open ChatGPT's connector settings
Go to chatgpt.com/#settings/Connectors. You'll land on the Apps section of your ChatGPT settings.
Click 'Advanced settings'
Scroll to the bottom of the Apps panel and click Advanced settings.
Enable Developer mode
Toggle Developer mode on. ChatGPT will show an Elevated risk warning - that's expected. Custom MCP servers go through this gate because OpenAI hasn't reviewed them. We obviously vouch for the athletedata server, but use your own judgement here.
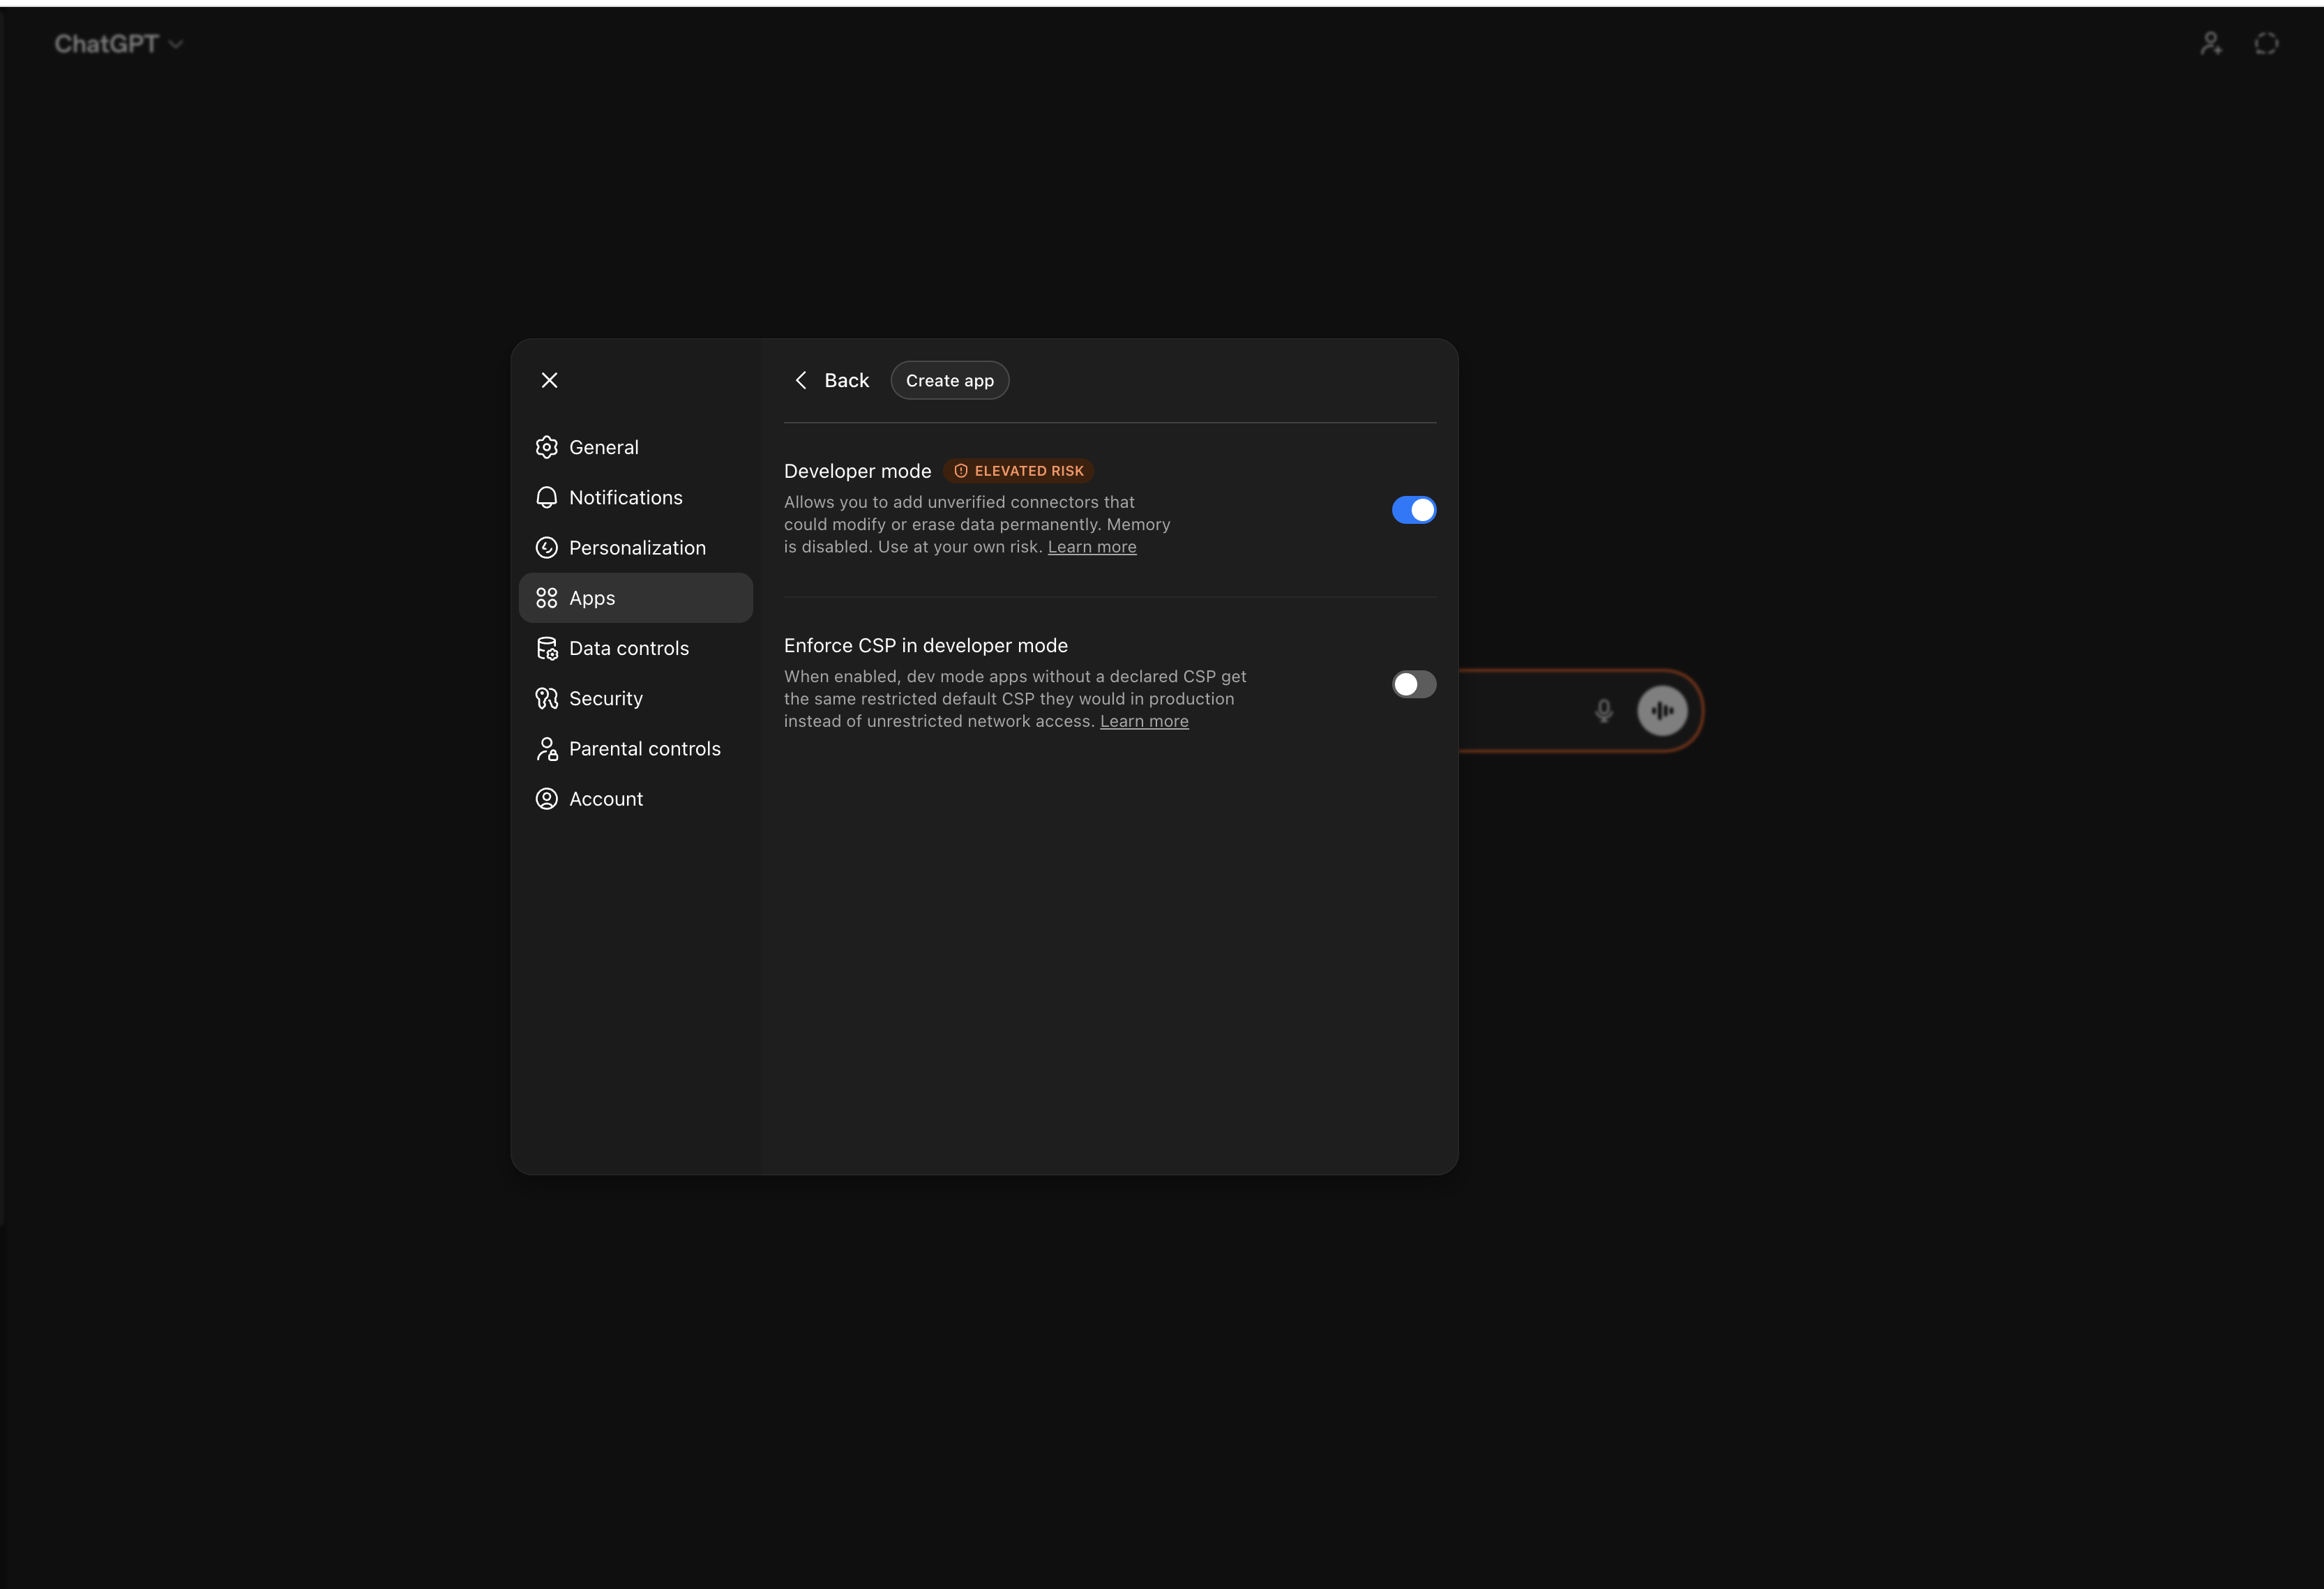
Once Developer mode is on, click Create app at the top of the panel.
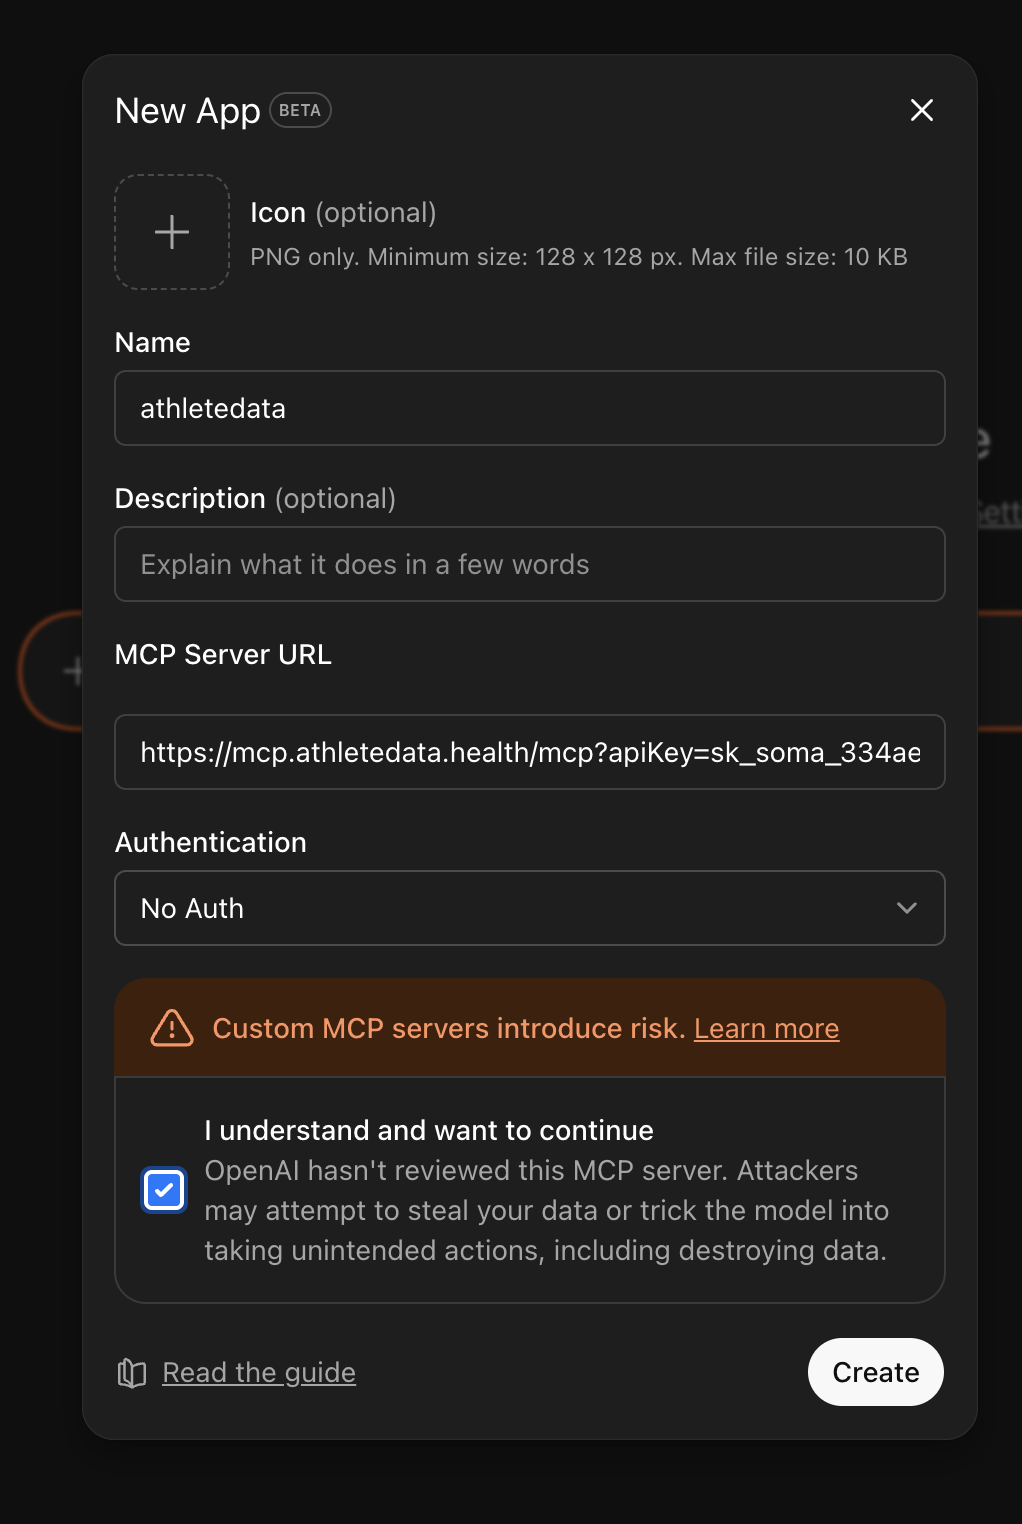
Fill out the form
A New App dialog opens. Fill it out:
- Name:
athletedata - MCP Server URL: grab it from your dashboard using the Copy MCP URL button. Paste it in.
- Authentication: select No Auth from the dropdown. This is the important part - authentication is already handled by the API key embedded in the URL, so ChatGPT shouldn't add a second auth layer on top.
- Tick I understand and want to continue.
Click 'Create' and start chatting
Hit Create. The athletedata connector now lives in your Apps list and will be available in new chats. Open a new conversation and ask:
Pull my last 4 weeks of Strava runs and tell me whether my training load is sustainable given my recent HRV.
Depending on your client, you may need to explicitly mention the connector by name (“use the athletedata connector to...”) on the first message.
Not working?
- If ChatGPT keeps asking you to authenticate, you probably left the Authentication dropdown on something other than No Auth. Edit the connector and switch it.
- Make sure the URL contains
?apiKey=followed by your full key - if you only pastedhttps://mcp.athletedata.health/mcp, the connector will fail. - Make sure your athletedata subscription is active - check your billing page.
- Connect at least one app (Strava, Garmin, WHOOP, etc.) on the integrations page - otherwise the tools have nothing to query.
- Stuck? Email team@athletedata.health and I'll help directly.